WordFence Auto Sense Firewall (images to come!)
An issue has been identified with a Wordpress Security Plugin that makes it so that it’s setup for the auto sensing Firewall will never complete the setup – offering users with a very annoying message on their dashboard about setting it up.
You can do any of these: code it out in your theme (not recommended, but this was a fix by the WordFence folks), click the Dismiss button (this won’t complete the setup but won’t bug you any more), or you can follow these instructions.
The Plugin Option requires access to a file called php.ini, on a shared server it’s pretty rare to have direct access to this, some servers allow it but the way cPanel is setup our php.ini overrides anything set in a user’s php.ini file.
That being said, with options in your php.ini in your user directory being overridden by the system we have to get creative to finish off the setup. Follow these steps to complete the setup:
1) Log into your cPanel account by going to yourdomain.com/cpanel – if you need your username and password please have the account holder reach out to us via our Support Help Desk
2) In cPanel, click on File Manager

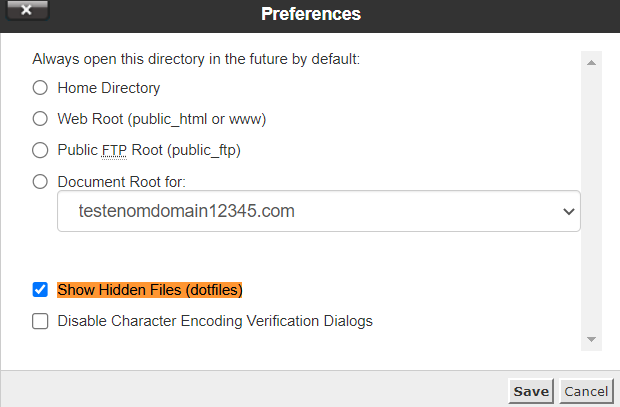
3) In the top right corner of the screen click on the Settings button
4) In the bottom section of the window that pops up place a check mark beside Show Hidden Files and click Save
5) Now, on the left hand side click the + beside public_html![]()
6) Click on the folder that your Wordpress is installed in (most of the time you can skip step 5 and just simply click on public_html, but sometimes the CMS is installed on a subdomain or in a sub folder, in my case it’s on a subdomain called wp, so I will click on the wp folder)
7) Leave this screen how it is, and either open a new Tab on your browser or open a new browser window
8) Go to your WP-ADMIN dashboard by going to yourdomain.com/wp-admin (if you have a subdomain it’ll be subdomain.domain.com/wp-admin/, or if it’s just a subdirectory then it’ll be yourdomain.com/subdirectory/wp-admin)
9) Log in with an Administrator Username and Password
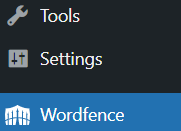
10) Once logged in, in the menu on the left side of the screen look for and click on Wordfence
11) At the top of the screen look for this dialog:
12) Click on the Click here to configure button, and look for the following section (about midway through the page)
Ignore their recommendation…it’s not accurate in the least, and with my tests it auto-selects this no matter how you have the server setup
13) Click the drop down menu and select “Apache + suPHP” but don’t click continue just yet!
14) Under that drop down you will see a line of text in a grey box (don’t worry about understanding it but it will look like this: auto_prepend_file = '/home/username/public_html/subdirectory/wordfence-waf.php' Copy this text somewhere safe – like trusty old Notepad as we’ll need it in a few steps.
15) Now, look up a few lines and click on Continue
16) On the next screen you’ll see a “Download .htaccess” button, this will make a backup of your htaccess file so that if something goes weird you can restore it with ease…but click that button
17) Once it’s been clicked, the Continue button will illuminate and now you can click Continue
18) You will now see this message at the top of the screen…but we can ignore it
19) Now is where the fun begins….go back to the Window/Tab with File Manager still open (this is why I said to leave it logged in and open)
20) In the list of files on the right, locate the .htaccess file, usually it will be at the top of the list of files under a few directories (like wp-content, wp-admin, etc.)
21) Right click on the icon to the left of .htaccess to see the following menu
22) Click on Edit, and then on the new window that pops up click on the Edit a second time
23) You’ll see a fair amount of information in here, most of which can be ignored…at the very top of the file you’ll want to take parts of that text that you copied from before into Notepad and put it in here.
First, copy this text here (it will be the same no matter where WP is installed, and what your username is:
php_value auto_prepend_file and paste that into the .htaccess file
In your Notepad, you will want to copy only “/home/username/public_html/subdirectory/wordfence-waf.php” (where username is your cpanel username, and subdirectory may or may not be in there, but if your Wordpress is on a subdomain or in a subdirectory you’ll want to put the directory or subdomain in place of the “subdirectory” text I’m referencing above and paste it with a leading ‘ and a trailing ‘, so if my username was support, and my domain was installed to a subdomain called WP my full line would look like this:
php_value auto_prepend_file ‘/home/support/public_html/wp/wordfence-waf.php’
24) I could copy the above text and paste it into the .htaccess file and then click Save Changes
25) Then click the Close button
26) Once you’ve done that you can go back to your Wordpress Dashboard and refresh….and voila problem solved:
If you have any questions or concerns please let us know by opening a ticket or calling.