Setting up Auto Responder/Out of Office Reply
Going away on vacation and want to tell someone you're doing then when they email you instead of sending out a blast to all your contacts? Follow these instructions to get this done.
There are 2 ways to set this up:
1) cPanel
2) Webmail
I will go through both:
cPanel
1) Log into your cPanel account by navigating to http://yourdomain/cpanel
If you should have these credentials but don't have them, have lost your password and/or username, etc. e-mail our support team at support AT cloud.webpal.net or open a ticket in the Customer Portal.
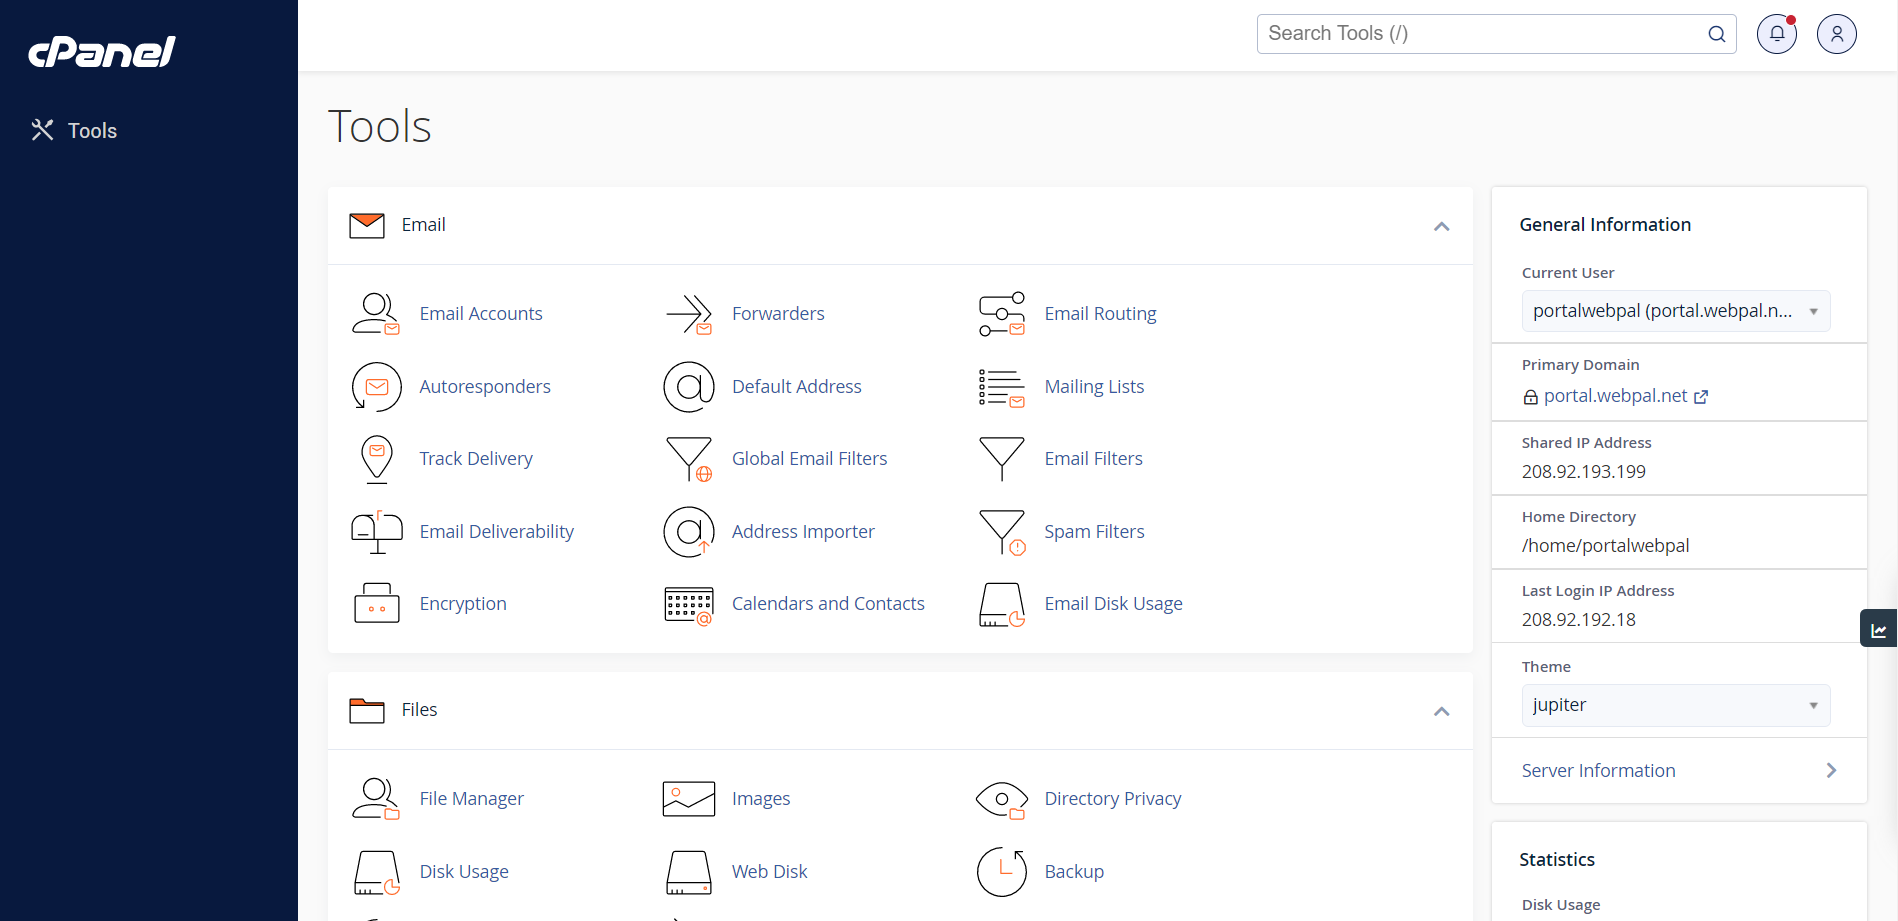
You should get the following screen or something similar:
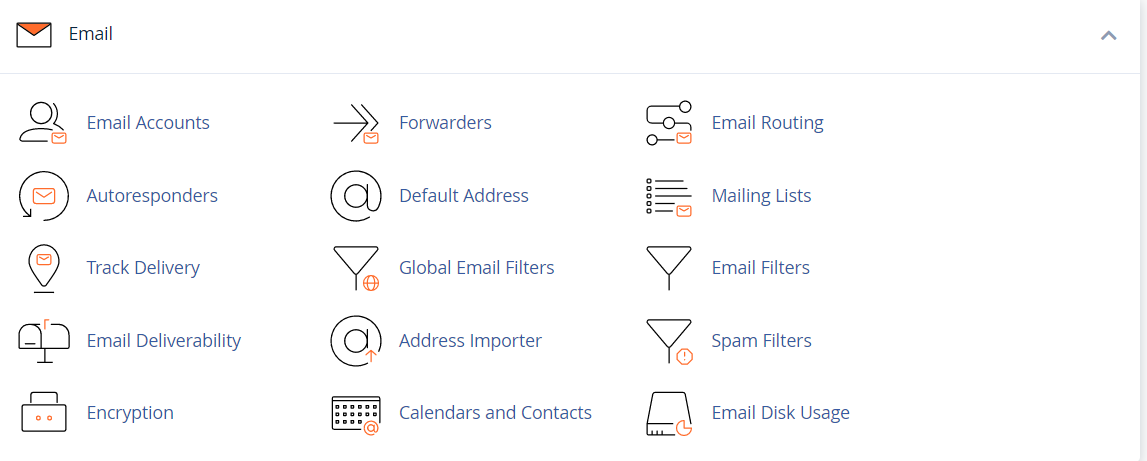
2) Once here, scroll down to the Email section:

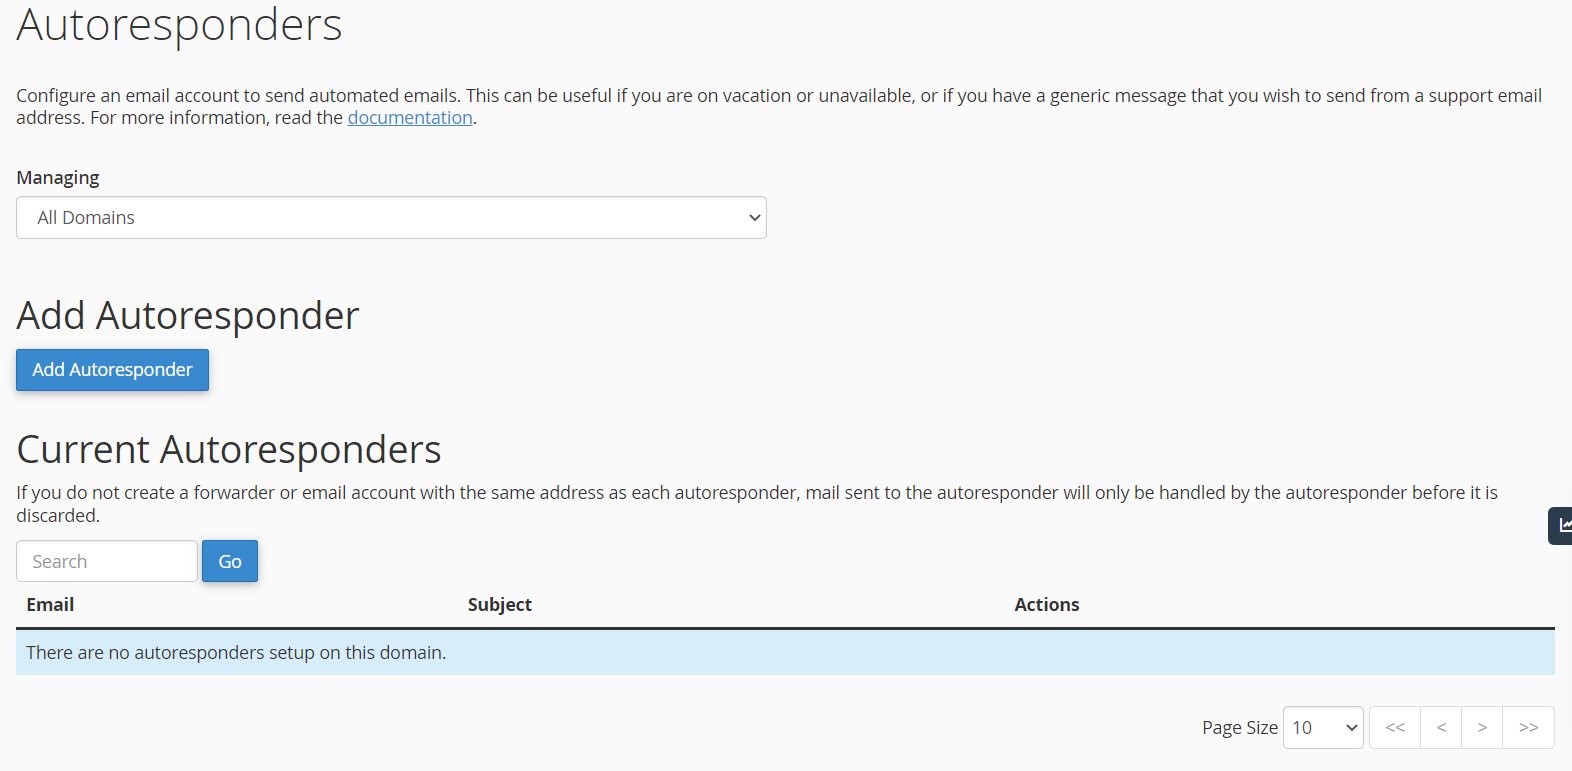
3) Click Autoresponders to get to this screen:

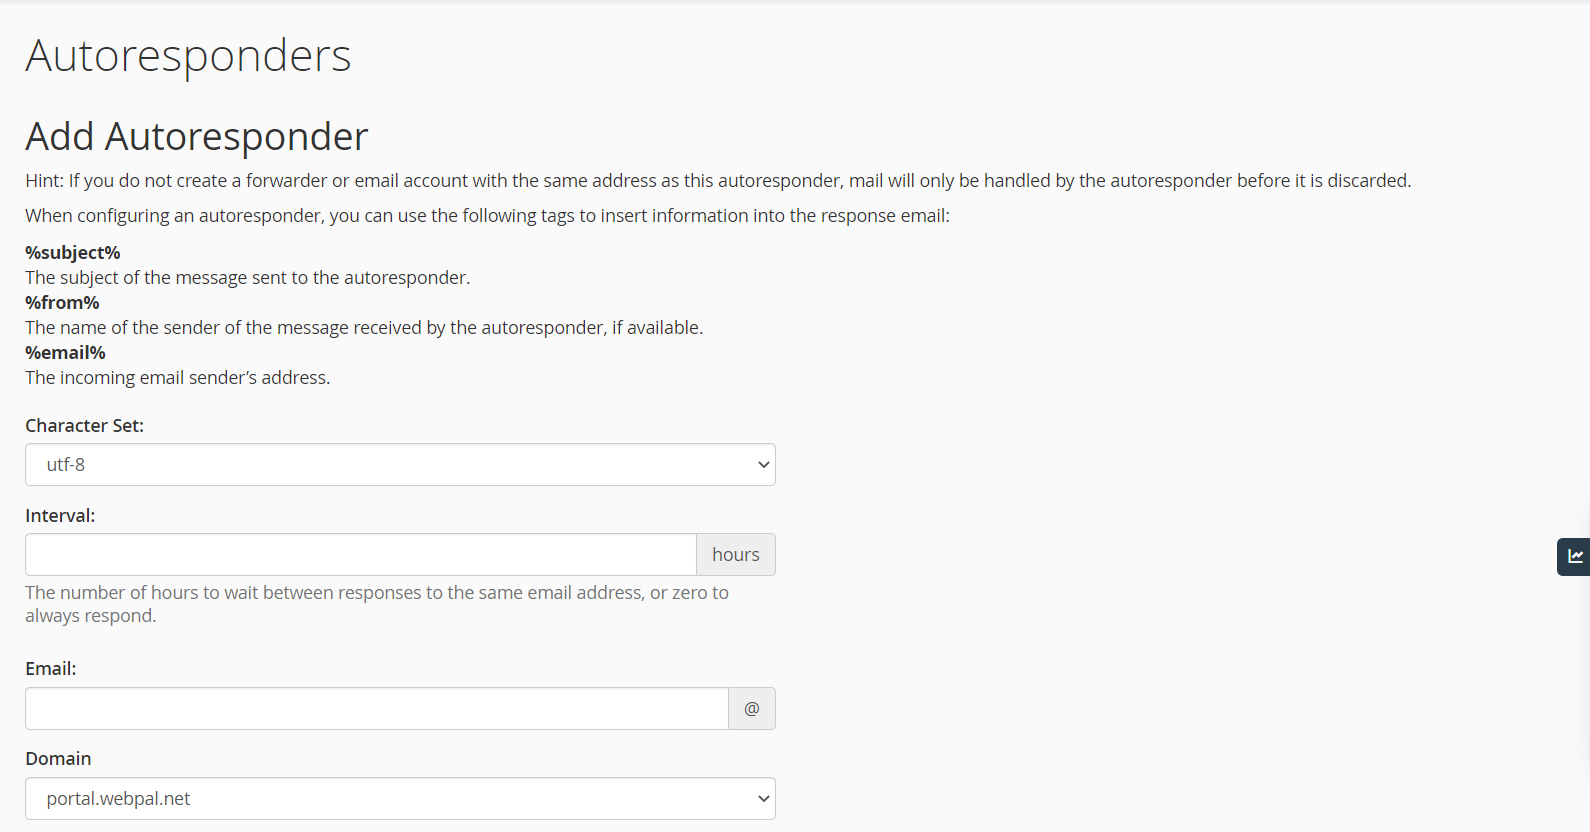
4) Click on Add Autoresponder to get the following screen:

5) Once here, fill out all of the information on the screen as it is requested, they are explained in detail below:
Character Set: This can and should be left as utf-8 as almost all if not all E-Mail Clients understand this character set.
Interval: Set this to set an option on the system to reply to someone again to remind them you are out of the office. So if you set this to 8 hours, and I email you now and then 9 hours from now I will get 2 notifications that you are out of the office, but if I email you once now and then in 2 hours I will only get the notice on the first email.
Email: Your email address without the domain at the end, so if I'm michael@example.com then I would use just "michael" without the quotes.
Domain: This can be left as is.
From: This will always be your name, this isn't auto-filled in but we suggest to put it to someone's name at all times to avoid being rejected from the remote server
Subject: This is what will be sent back in your Subject line, e.g. I'm out of the officeâ€
This message contains HTML: You can leave this unchecked, most people don't use HTML in their out of office autoresponder
Body: This is where the meat of your auto responder will be, this is where you can explain that you will or will not have email access, when you're leaving and coming back. That sort of thing.
Start: When set, this is when our system will start to reply with your autoresponder
Stop: When set, this is when our system will stop replying with your autoresponder
6) Once you have filled all of that out click Create/Modify
7) All set!
Webmail
1) Navigate to http://domain.com/webmail
2) Login with your full email address and password
3) Click on your Email address at the top right:

The address I had here is blanked out for privacy reasons, your blue box will show your email address
4) Click on Autoresponders in the drop down menu that pops up:

5) Clicking Autoresponders will get you to this screen:
6) Click on Add Autoresponder to get the following screen:

7) Once here, fill out all of the information on the screen as it is requested, they are explained in detail below:
Character Set: This can and should be left as utf-8 as almost all if not all E-Mail Clients understand this character set.
Interval: Set this to set an option on the system to reply to someone again to remind them you are out of the office. So if you set this to 8 hours, and I email you now and then 9 hours from now I will get 2 notifications that you are out of the office, but if I email you once now and then in 2 hours I will only get the notice on the first email.
Email: Your email address without the domain at the end, so if I'm michael@example.com then I would use just "michael" without the quotes.
Domain: This can be left as is.
From: This will always be your name, this isn't auto-filled in but we suggest to put it to someone's name at all times to avoid being rejected from the remote server
Subject: This is what will be sent back in your Subject line, e.g. "I'm out of the office"
This message contains HTML: You can leave this unchecked, most people don't use HTML in their out of office autoresponder
Body: This is where the meat of your auto responder will be, this is where you can explain that you will or will not have email access, when you're leaving and coming back. That sort of thing.
Start: When set, this is when our system will start to reply with your autoresponder
Stop: When set, this is when our system will stop replying with your autoresponder
8) Once you have filled all of that out click Create/Modify
9) All set!